How Do I Make Sure My Gel Is Fully Cured?
To ensure your gel fully cures, apply it evenly, cap the edges, and use a quality lamp for faster curing. Monitor time and temperature closely, and follow guidelines precisely. Thin layers and proper curing times are key to a flawless finish. Check for tacky spots or bubbles post-cure to achieve a smooth, glossy look. Don't forget post-cure care like cleansing and cuticle oil. Professional services use high-quality lamps for optimum results. Mastering these steps will lead to a long-lasting, professional gel manicure. More advanced tips await for perfecting your gel curing technique!
Key Takeaways
- Apply thin, even layers for effective curing.
- Use a high-wattage LED lamp for faster curing.
- Follow recommended curing times and temperatures closely.
- Check for proper curing using visual and touch tests.
- Maintain post-curing care for lasting results.
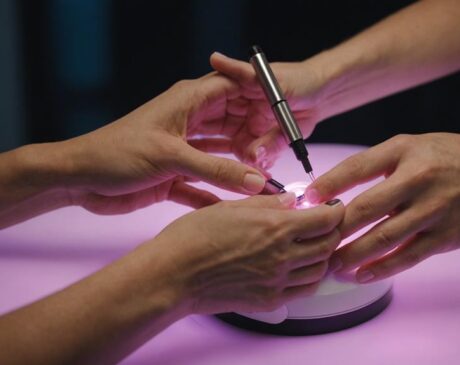
Proper Application Techniques
To ensure proper gel curing, you should apply the gel using even strokes to achieve an even coat. This technique is crucial for a flawless finish that not only looks professional but also ensures that the gel cures evenly. By applying the gel in thin, even layers, you allow the curing process to be more effective, resulting in a longer-lasting manicure.
Another innovative tip is to make sure you cap the edges of your nails with each layer of gel. This sealing technique helps prevent chipping and ensures that the gel adheres properly to your nails. Additionally, consider using a quality gel brush that allows for precise application, giving you more control over the thickness of each layer.
Experiment with different application techniques to find what works best for you. Whether you prefer long, sweeping strokes or short, precise movements, the key is to apply the gel evenly and efficiently. With practice and attention to detail, you can master the art of gel application for perfectly cured nails every time.
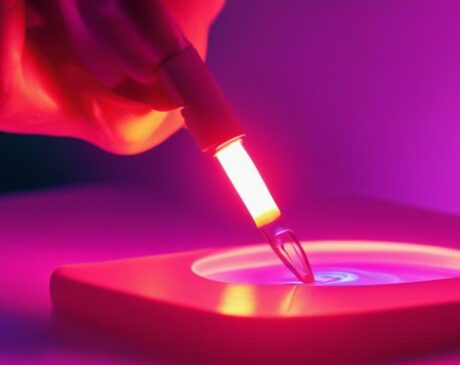
Using the Right Curing Lamp
For optimal gel curing results, selecting the appropriate curing lamp is key. The right curing lamp can make a significant difference in the quality of your gel manicure. To help you make an informed decision, consider these factors when choosing a curing lamp:
| Feature | Description | Benefits |
|---|---|---|
| LED vs. UV | LED lamps cure gel faster | Saves time and energy |
| Wattage | Higher wattage = quicker cure | Speeds up the curing process |
| Timer Settings | Customizable curing times | Allows for precise curing control |
Curing Time and Temperature
Achieve optimal gel curing by carefully monitoring the duration and heat levels during the curing process. The curing time and temperature play a crucial role in ensuring that your gel manicure sets perfectly. Different gel polishes and lamps may have specific curing requirements, so it's essential to follow the instructions provided by the manufacturer. Generally, most gel polishes require curing times between 30 to 60 seconds per layer under a LED lamp, while UV lamps may require longer curing times of around 2 minutes per layer. The temperature of your curing lamp can also impact the curing process. Ensure that your lamp is not too hot, as excessive heat can lead to improper curing and potential skin irritation. By maintaining the correct curing time and temperature, you can achieve a flawless gel manicure that lasts. Experiment with different curing times and temperatures to find the perfect balance for your favorite gel polish brands and nail art creations.
Avoiding Thick Gel Layers
To ensure you avoid thick gel layers, remember to apply a thin layer of gel polish. This will help with even product distribution and prevent curing issues. Additionally, make sure to follow the proper curing time recommended for the gel product you are using.
Thin Gel Application
Wondering how to ensure a flawless gel cure? Achieving thin gel application is key to avoiding uneven curing and ensuring a perfect manicure. When applying gel polish, remember that less is more. Begin with a thin layer of gel, spreading it evenly to cover the nail without creating a thick buildup. Thin layers not only cure more effectively under the UV or LED lamp but also result in a smoother and longer-lasting finish. To prevent overheating or under-curing, apply multiple thin coats if needed, curing each layer properly. Embrace the art of precision and finesse in your gel application technique to achieve professional results every time. Thin gel application is the secret to a flawless, long-lasting manicure that shines with brilliance.
Even Product Distribution
For optimal gel curing, focus on ensuring even product distribution to avoid thick gel layers. Uneven application can lead to certain areas curing inadequately, resulting in an uneven finish. To achieve a consistently thin layer of gel, consider using techniques such as the "three-stroke method" or the "four-dot technique." The three-stroke method involves applying the gel in three even strokes, starting from the cuticle to the free edge, ensuring an even distribution. On the other hand, the four-dot technique involves placing a small dot of gel near the cuticle, center, and sides of the nail, then spreading the gel evenly. These methods promote a uniform application, preventing thick gel layers and ensuring a thorough and efficient cure.
Proper Curing Time
To prevent thick gel layers, ensure you follow the recommended curing time for optimal results in your gel application process. Proper curing time is crucial for achieving a flawless gel finish. Overexposure to the curing lamp can lead to thick layers that are prone to chipping and peeling. On the other hand, under-curing may result in a sticky residue that affects the durability of the gel. By adhering to the specified curing times provided by the gel manufacturer, you can ensure that each layer cures evenly and thoroughly. This not only enhances the longevity of your gel manicure but also maintains the integrity of the nail enhancement. Remember, precise curing times are key to achieving professional and long-lasting gel nails.
Checking for Proper Curing
Now, let's talk about the POINTS you can use to ensure your gel cures properly. The Visual Inspection Method and Touch Test Technique are two reliable ways to check for proper curing. By utilizing these methods, you can confidently ensure that your gel nails are curing correctly.
Visual Inspection Method
Inspecting the cured gel visually is a crucial step to ensure proper curing. To begin, look for any areas that still appear tacky or uncured. These sections may seem slightly cloudy or have an uneven finish compared to the rest of the gel. Additionally, check for any visible bubbles or imperfections that could indicate incomplete curing. A fully cured gel should have a smooth, glossy surface with no sticky or matte areas. Utilizing a magnifying glass or a nail lamp with a magnifying function can help you examine the gel more closely for any subtle signs of incomplete curing. By conducting a thorough visual inspection, you can guarantee a flawlessly cured gel for your nail enhancements.
Touch Test Technique
For a quick and effective way to check for proper gel curing, simply lightly press your finger over the surface of the gel to see if it feels completely dry and solid. This touch test technique is a simple yet innovative method to ensure your gel is fully cured. When you lightly touch the gel, it should not leave any fingerprints or feel tacky. If it does, it likely needs more time under the lamp. By incorporating this quick check into your gel curing process, you can confidently move forward without any worries about under-cured gel. Remember, a dry and solid feel indicates a job well done, giving you the assurance that your gel nails are perfectly cured and ready to show off.
Post-Curing Care Tips
After curing your gel, gently cleanse the surface to remove any residue and reveal a smooth finish. This step is crucial to ensure your manicure looks flawless and lasts longer. Once the gel is fully cured and cleaned, consider applying a nourishing cuticle oil to keep your nails healthy and hydrated. This post-curing care routine will not only enhance the appearance of your nails but also promote their overall health.
To further protect your gel manicure, consider wearing gloves while doing household chores or any activities that may expose your nails to harsh chemicals or excessive moisture. Additionally, avoid using your nails as tools to prevent chipping or lifting of the gel polish. By incorporating these simple yet effective post-curing care tips into your routine, you can prolong the longevity of your gel manicure and enjoy beautiful nails for weeks to come. Remember, a little care goes a long way in maintaining your perfect gel nails.
Frequently Asked Questions
Can I Cure Multiple Layers of Gel at Once?
You can cure multiple layers of gel at once by ensuring each layer is thin and fully applied. Use a quality LED or UV lamp for recommended curing times. This method saves time and produces a smoother finish.
How Can I Prevent Gel From Shrinking During Curing?
To prevent gel from shrinking during curing, ensure you apply thin layers, avoid overworking the gel, and use a quality UV/LED lamp. These steps promote even curing and minimize the risk of shrinkage for flawless results.
Is It Safe to Cure Gel for Longer Than Recommended?
Curing gel for longer than recommended can be risky. Follow instructions precisely for optimal results. Experiment cautiously, keeping an eye on the process. Safety first, but innovation can lead to breakthroughs.
Can I Use a Different Brand of Gel With My Curing Lamp?
You can generally use different gel brands with your curing lamp. Ensure the gel is compatible with your lamp's wavelength for optimal results. Experimenting with various brands can lead to new discoveries and better nail outcomes.
What Should I Do if My Gel Still Feels Tacky After Curing?
If your gel is still tacky after curing, try applying a thin layer of rubbing alcohol and then curing again. This trick helps seal the gel and ensures a fully dried finish. Remember, a little alcohol can work wonders!