How do you make press-ons look real?

Press-on nails have become a popular alternative to traditional nail care, offering convenience and variety. However, the key to achieving an elegant and professional look is its realistic appearance. Realistic press-on nails not only enhance the beauty of your hands, but also fully reflect your attention to detail and personal grooming standards. They blend seamlessly with your natural nails so it’s hard to tell the two apart. This is crucial in a professional setting, as an elegant appearance often equates to competence and professionalism. Additionally, properly used, authentic-looking press-on nails can boost your confidence and allow you to present yourself in the best possible light.
Choosing the Right Press-On Nails
Factors to Consider When Choosing a Press-On
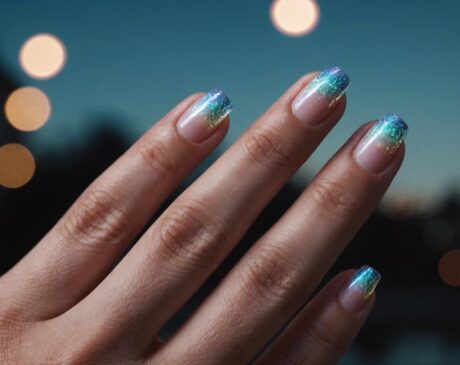
Shape, size and color: The first step to getting natural looking press-on nails is choosing the right shape, size, and color. The shape of your nails should match the natural shape of your own nails and fingers. Whether you prefer oval, square, or almond shapes, choose a shape that looks natural on your hands. Size is equally important. Press-on nails that are too large or too small may look unnatural and may not adhere properly. Color choice is also key. While vibrant and unique colors can be fun, for a realistic look, choose shades that mimic the natural color of your nails or a classic French manicure.
Quality and brand reputation: Quality is crucial when choosing press-on nails. High-quality nails not only look more realistic, but they are also more durable. They are less likely to chip, peel, or separate from the nail bed. It’s worth investing in reputable brands that are known for their quality and realistic look. Read reviews and seek advice to find the best brands that combine beauty and durability.
Customize Press-On Nails for a Natural Look
Customize them to fit your nail size: To ensure a perfect fit, it may be necessary to customize the press-on nails to your nail size. Most press-on kits come in different sizes but can be fine-tuned by filing the edges for a customized fit. Make sure the press-on piece does not extend beyond the sidewall of your natural nail, as this can expose the artificial nature of the nail.
Choose colors and designs that look natural: For the most natural look, choose colors and designs that are subtle and mimic the look of natural nails. Nude, pink, and light beige are good choices. If you prefer designs, choose ones that enhance rather than overwhelm the natural beauty of your nails, such as minimalist patterns or embellishments.
Preparing Your Natural Nails
Cleaning and Nail Bed Preparation
Clean surfaces are important: Before pressing, it is vital to first ensure that the surface is clean and dry. Any grease, dirt, or moisture on your natural nails will prevent proper adhesion and shorten the life of your press-on nails. Even if you are not wearing nail polish, use a nail shampoo to thoroughly clean the nail bed, as this step is crucial for removing natural oils.
How to properly prepare nails: After cleansing, gently push away cuticles and buff the surface of your nails. This will create a slightly rougher surface that will help the adhesive bond more effectively. Be careful not to over-buff as this can weaken your natural nails.
Apply Base Coat for Better Adhesion
Choose the right base coat: Choose a base coat designed for press-on nails. Some base coats have adhesive properties that can improve the grip of your press-on nails. A good base coat will also protect your natural nails from any potential damage caused by adhesives.
Long-lasting application tips: Apply a thin, even coat of base coat and allow it to dry completely before pressing. Avoid using too much product as this may cause the press-on to lift or move. The primer acts as a base to ensure that your press-on nails stay in place for as long as possible.
Proper Use of Press-On Nails
Aligning Press-On Nails for a Natural Fit
Alignment step-by-step guide:
- Match sizes: Begin by matching each press-on nail to the appropriate finger. Place them to avoid confusion during application.
- Apply adhesive: Depending on your preference, apply a small drop of adhesive to the press-on nail or place an adhesive tab on the back.
- Angle and press: Start by pressing the edge of the cuticle at a small angle. Then, gently roll the nail onto your natural nail to ensure it is properly aligned.
- Press firmly: Press firmly for about 10-20 seconds to ensure the nail is firmly bonded.
Tips to avoid common mistakes:
- Avoid touching the adhesive with your fingers.
- Do not use too much adhesive as it may spill and create a messy appearance.
- Ensure that the press-on does not go beyond the side wall of the natural nail as this looks unnatural.
Securely Fixing the Press-On Nails
Adhesive options and techniques:
- Nail Glue: provides a strong and lasting bond. Use a high-quality glue and apply in small amounts.
- Adhesive Sheets: a gentler option, ideal for short-term wear. They make removal easier and reduce the risk of nail damage.
Ensure a long-lasting bond without causing damage:
- Apply glue or adhesive tabs evenly, avoiding the skin around the nail.
- Do not press on damaged or infected nails as this can exacerbate the problem.
Finishing for a Realistic Look
Filing and Shaping
Natural Shape Tip:
- File the edges of the press-on nails to precisely fit the natural shape of the nail bed.
- Gently stroke to avoid splitting or cracking the press-on nail.
Tools needed for precision:
- Fine-grained nail file for shaping.
- Buffer for smoothing any rough edges.
Adding a Top Coat for Shine and Protection
The best top coat for creating a realistic look:
- Choose a high-quality clear topcoat, preferably with a glossy finish, to mimic the look of natural nails.
- Some topcoats also offer UV protection to prevent discoloration.
How to apply professional finishes:
- Apply topcoat in thin, even coats.
- If necessary, allow each coat to dry thoroughly before applying another.
Maintenance Tips for Lasting Realism
Daily Care for Press-On Nails
Daily Maintenance Tips:
- Keep hands and nails moisturized.
- Wear gloves when doing chores to protect the press-on nails from harsh chemicals.
How to prevent lifting and damage:
- Avoid using your nails as tools to prevent lifting or breaking.
- Check regularly for signs of lifting and apply a small amount of glue when needed.
When to Replace or Reapply
Signs that your press-on nails need attention:
- Lifting at the edges.
- Visible wear, such as nicks or cracks.
Steps to safely remove and reapply:
- Soak nails in warm soapy water to loosen adhesive.
- Gently lift edges with a cuticle pusher.
- Avoid pulling or forcing nails to prevent damage.
- Reapply new press-on nails following the same preparation and application steps.
Mastering the art of using and maintaining press-on nails can dramatically enhance your personal style and create a professional, sophisticated look. Key points in achieving realistic press-on nails include choosing the right nail type and quality, properly preparing natural nails, ensuring accurate application, and performing routine maintenance. By paying attention to details such as fit, alignment, adhesive selection, and final touches such as filing and topcoat application, press-on nails not only look realistic but are more durable and protect your natural nails. The benefits of mastering this skill are manifold. It allows for versatility and creativity in your appearance, saves time and money compared to a trip to the salon, and can be a fun, expressive way to enhance your personal grooming habits.
Frequently Asked Questions
How long can you actually wear press-on nails?
You can usually wear press-on nails for about 1 to 2 weeks. The longevity of your nails depends on the quality of the nail, the effectiveness of the adhesive used, and how well the nail is maintained. It is important to follow proper application and maintenance techniques to maximize wear time.
Can press-on nails damage your natural nails?
Press-on nails will not damage your natural nails if applied and removed correctly. Damage is usually caused by improper removal, such as peeling the nail too hard or using too much glue. To minimize the risk, it is recommended that adhesive tabs be used for short-term wear and that the nails be gently soaked to facilitate removal.
Are press-on nails reusable?
Yes, press-on nails can be reused, especially if they are of high quality and carefully removed. After disassembly, remove any adhesive residue from the press-on nails and store them properly. Reusing press-on nails is not only cost-effective but also environmentally friendly.
How can I keep my press-on nails longer?
To ensure longer wear, start by preparing your nails properly, using a quality adhesive, and applying a base coat before pressing. Avoid submerging your hands in water for long periods of time and wear gloves when performing tasks that could weaken the adhesive. Regularly check edges for buckling and apply additional adhesive if necessary.
Are there any health precautions to be aware of when using press-on nails?
It is important to ensure that your natural nails and surrounding skin are healthy before use. Avoid using press-on nails if you have any nail infections or if your natural nails are severely damaged. Always use a high-quality, non-toxic adhesive and give your natural nails a break between applications to breathe and recover. If you experience any allergic reaction or discomfort, discontinue use immediately and consult a professional!


